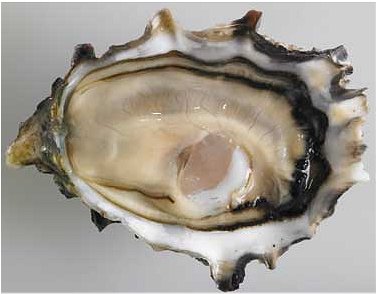
How to
Easily Shuck Fresh Oysters
Opening oysters, known
as shucking, requires a certain amount of skill, which can
easily be attained with some practice. The preferred method is to
use an oyster knife which is a variant of a shucking knife which has
a short and thick blade that is about 2 inches long. So now you have
the right tool for the job, how so we best use it?
Before shucking, I advise you to give them all a good scrub under
running water first and then place the oysters in the freezer for
about 15-20 minutes to help relax the mussels for an easier job.
Once removed from the freezer, insert the knife blade with a fair
amount of force at the hinge between the two valves.
Then you will want to twist the blade until you hear a slight pop.
Then slide the blade upward to cut the adductor muscle (itís like an
umbilical cord) which holds the shell closed. Be very careful not to
apply too much force as you donít want to give yourself
 a serious
injury if the blade slips. Heavy gloves are advised to help prevent
this, but not only from the sharp knife, but the shell itself can be
razor sharp too.
If the oyster has a reasonably soft shell, the knife can be inserted
into the side door as such, which is about halfway along one side
where the oyster lips widen and there is a small indentation. You
will want to do this over a bowl so that you can catch the oysterís
juices. Now scrape the meat from the top shell into the bottom
shell. Use the knife to cut the oyster from the bottom shell, or
serve it on the half shell and preferably give it a wash to remove
any grit or shell fragments for taste and a better presentation.


 a serious
injury if the blade slips. Heavy gloves are advised to help prevent
this, but not only from the sharp knife, but the shell itself can be
razor sharp too.